Inflating an inflatable kayak can be a bit tricky, especially for beginners. The key is to follow the right order: start by partially inflating the floor chamber to about 60%, then the side walls, before fully inflating the floor and side chambers, and lastly the accessories like seats and skegs.
How to inflate an inflatable kayak properly is crucial to ensure your boat’s longevity and performance. Read on to learn the complete step-by-step guide and troubleshooting tips to make inflating your kayak a breeze.
How to Inflate an Inflatable Kayak?
To inflate an inflatable kayak, start by unfolding it on a flat surface. To become a pro follow these steps.
Equipment Needed for Inflation
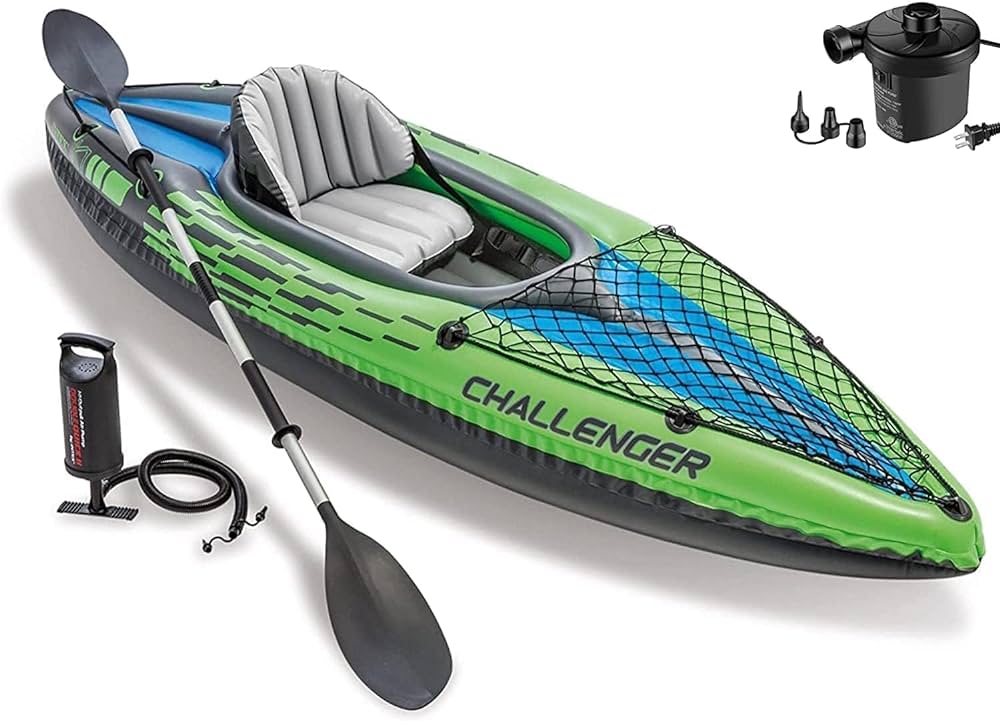
Inflating a kayak is simple if you have the right tools. Here’s what you need:
- High-Pressure Air Pump: Choose between manual (hand or foot) and electric pumps. Electric pumps are faster but need a power source.
- Pressure Gauge: This helps you know how much air is in the kayak, so you don’t over-inflate it.
- Valve Adapters: These make sure your pump fits the kayak’s air valves.
- Repair Kit: Handy for fixing any small holes or leaks.
With these items, you’re all set to get your kayak ready for water adventures without any fuss!
Step 1: Preparation
Before inflating your kayak, getting ready is key. Here’s how:
- Find a Good Spot: Choose a flat, clean area away from sharp objects like sticks or rocks.
- Check the Weather: Too hot or too cold can affect how you inflate the kayak.
- Read the Manual: Every kayak is a bit different. Your kayak’s manual tells you how to inflate it correctly.
- Gather Your Tools: Make sure you have your air pump, pressure gauge, valve adapters, and repair kit.
Preparing like this makes inflating your kayak easy and keeps it safe to use on the water.
Step 2: Unfolding and Layout
Now it’s time to get your kayak ready:
- Carefully Unfold: Gently lay out your kayak on the chosen spot. Avoid dragging to prevent tears.
- Spread it Out: Open your kayak fully so every part is easy to see and reach.
- Check for Damage: Look for any holes or wear before you start inflating. It’s easier to fix them now.
A smooth, flat layout helps you see everything clearly and ensures your kayak is safe and ready for adventure.
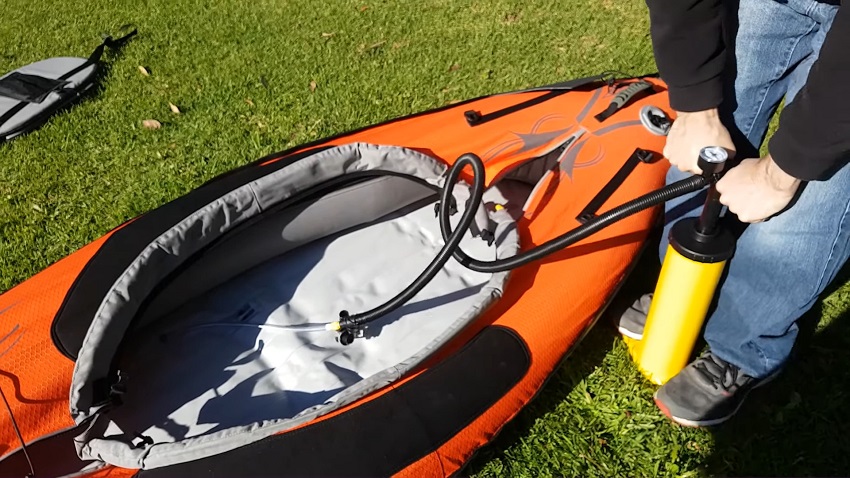
Step 3: Inflating the Floor Chamber
Time to start inflating:
- Focus on the Floor First: Begin with the floor chamber of your kayak.
- Not Too Full: Pump it up to about 60-70% full. This gives it shape but leaves room for adjustment.
Why do it this way?
- Makes Room: Partially inflating the floor helps you fit other parts better later.
- Even Shape: It helps the kayak take on an even shape, making the rest of the inflation smoother.
Remember:
- Use the Right Pump: Attach your pump using the correct valve adapter.
- Watch the Pressure: Use a pressure gauge to avoid over-inflation.
Inflating the floor chamber first sets the base for your kayak. It’s like laying down the foundation of a house, ensuring everything else fits perfectly as you build up.
Step 4: Inflating the Side Chambers
Next up, the side chambers:
- Start Side Inflation: After the floor, inflate the side chambers of your kayak, but only partway, like the floor.
- Keep it Even: Inflate both sides equally to avoid tilting or unevenness.
Why this order?
- Balance is Key: Partially inflating sides helps keep your kayak stable and shaped correctly.
- Easy Adjustments: This way, you can easily adjust the chambers to fit together perfectly.
What to remember:
- Same Pressure: Use your pressure gauge to ensure both sides have equal air pressure.
- Check Connections: Make sure the valves are secure so air doesn’t escape.
Inflating the side chambers after the floor means your kayak is nearly ready. Think of it like blowing up a big air mattress.
Step 5: Final Inflation and Checks
Now for the final touches:
- Full Inflation: Go back and finish inflating the floor and side chambers to the recommended PSI.
- Check Everything: Make sure all parts are inflated properly and evenly.
Why finish like this?
- Strength and Shape: Fully inflating now gives your kayak its full strength and the best shape for the water.
- Safety Checks: It’s your last chance to check for leaks or any unevenness.
Remember:
- Use Pressure Gauge: Always use it to hit the right air pressure and avoid over-inflating.
- Look Over Kayak: Check the seams and valves one more time to make sure everything is tight and right.
Finishing the inflation process and doing your final checks are like double-checking your homework before you turn it in.
Step 6: Inflating Seats and Accessories
Once the main air chambers (floor and sidewalls) are fully inflated, it’s time to inflate any accessories like seats, footrests, and spray skirts if your kayak has them.
Typically, you’ll want to:
- Locate the valve(s) for the accessory air chambers and prepare them for inflation, just like the main chambers
- Attach the inflatable kayak pump hose to the valve and inflate to the recommended PSI level using the pressure gauge
- For seats, once inflated, secure them in place using the hook-and-loop straps or clips provided
- Adjust footrests to a comfortable position for your leg length once installed
- Ensure spray skirts or other accessories are properly inflated and attached
Don’t skip this step! Properly inflating accessories is crucial for comfort, stability, and performance. An under-inflated seat can be uncomfortable and make paddling awkward.
Properly tensioned footrests help you brace and balance in the kayak. Spray skirts need the right inflation to stay taut and keep water out. Follow the manufacturer’s guidance and take the time to set up accessories right.
Step 7: Safety Checks and Adjustments
Before hitting the water with your newly inflated kayak, it’s essential to do a thorough safety check and make any needed adjustments.
The key things to inspect and adjust are:
- Air valves – Ensure all valves are properly closed and not leaking air
- Seams and surfaces – Run your hands along seams and the kayak body to check for any protruding objects or potential leak points
- Seats and accessories – Double check that seats, footrests, skegs etc. are securely attached and properly tensioned
- Safety gear – Make sure you have required safety equipment like life jackets and safety kits packed
- Load distribution – Adjust the positioning of gear and passengers to balance the kayak’s trim.
Don’t rush this step! A few minutes of checking everything over can prevent issues once on the water. Inspect the entire kayak closely – a slow leak or loose fitting can really ruin your paddling trip. And having all required safety gear is an absolute must before launching.
Step 8: Launching Your Kayak
The final step is to carefully launch your inflated kayak into the water and get underway.
Key things to keep in mind when launching:
- Location – Choose a flat, gradual area clear of obstacles to easily slide the kayak into the water. Inflatable kayaks good for the ocean and river
- Stability – Have someone help stabilize the kayak as you get in to avoid tipping
- Entry – Practice the proper entry technique (leg first, then sit down) to prevent falls
- Gear stowage – Make sure gear is properly stowed and secured before pushing off
- Water conditions – Check for any hazards like currents, waves or boat traffic before paddling out
Launching may seem straightforward, but it’s a critical step that requires care and preparation. Pick the right spot for an easy, obstacle-free entry into the water.
Get assistance to keep the kayak steady as you get in using the proper technique. Ensure your gear is secured and can’t shift unexpectedly. And always assess the water conditions before venturing out.

Troubleshooting Common Inflation Issues
Here are some common issues that can arise when inflating a kayak and how to troubleshoot them:
Troubleshooting Common Inflation Issues
- Air leaks – If you notice the kayak slowly deflating after inflation, check the valves are properly closed and sealed. Also, inspect the body closely for any punctures and apply a repair patch if needed.
- Under-inflation – Use a pressure gauge to ensure each air chamber is inflated to the recommended PSI level. Under-inflation can lead to poor performance and instability.
- Over-inflation – Avoid over-inflating as it puts excessive strain on seams. On hot days, leave a bit of room for air expansion. Over-inflation is a common cause of delamination and blown seams.
- Valve struggles – If valves are sticking or hard to open/close, apply a valve lubricant or soapy water around the valve stem. Avoid forcing stuck valves.
- Temperature effects – Cold air is denser, so top up chambers if inflating in colder temperatures. Hot air expands, so allow some room in the chambers on very warm days.
Taking the time to properly inflate each chamber and checking for any leaks pays off with better performance and longevity for your inflatable kayak investment.
Wrap Up
Learning how to inflate an inflatable kayak efficiently sets the stage for countless water expeditions. This guide offers you the essentials to get your kayak water-ready in no time. Embrace these steps, and inflating your kayak will soon feel like second nature, opening doors to endless aquatic adventures.
FAQs
Yes, inflatable kayaks are generally easy to inflate. With the right pump and technique, the process is straightforward and can be done quickly, even for beginners.
Inflating an inflatable kayak typically takes about 5 to 10 minutes. The exact time can vary based on the size of the kayak and the type of pump used.
The required psi for inflatable kayaks varies, typically ranging from 2.5 psi for the main chambers. Always check your kayak’s manual for the specific psi recommendation.