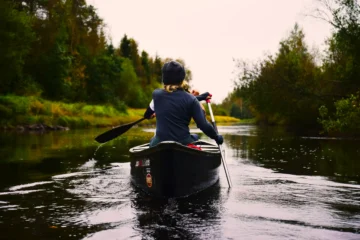
Did you know canoes were invented over 8,000 years ago? Building your canoe can be a fun and rewarding project. But where do you start when it comes to DIY canoe construction? What tools, materials, and techniques do you need?
The process involves careful planning, investing in quality wood like cedar, using staples and glue for a sturdy frame, and sealing the hull properly. In short, with some carpentry skills and patience, you can build a custom canoe from scratch.
Read on to learn the complete step-by-step guide to constructing your canoe for summer adventures.
Considering building your canoe? Find out if it’s a worthwhile endeavor in our guide: Is Canoe a Good Investment?
How To Build A Canoe?
Building a canoe is not an easy task but not so difficult. Follow our step-by-step guide to make it easy.
Step 1: Planning and Preparation
Building your canoe is epic! But before you dive into a pile of wood and tools, some crucial groundwork sets the stage for success.
Tools Required:
- 10 2-in spring clamps
- 2 7-in or 9-in paint rollers
- 2 paint scrapers
- 2 staple guns
- 20 clothespins
- 3 paint trays
- 4 6-in clamps
- Belt sander
- Cartridge-type respirator
- Chalk line
- Church-key can opener
- Combination square
- Coping saw
- Dust masks
- Electric drill
- Hand plane
- Jigsaw
- Orbital sander
- Router
- Rubber gloves
- Safety goggles
- Small tack puller
- Surfers file
- Table saw
- Wrenches
Materials Required:
- 2 1″x6″x8′ pine
- 2 1/2″x4’x8′ exterior fir plywood
- 2 1/4″x2″ hex head bolts with nuts and washers
- 2 1/4″x5″ hex head bolts with nuts and washers
- 20 1/4″x3″ lag bolts
- 26 1/4″x2-1/2″ hex head bolts with nuts and washers
- 3 1″x10″x16′ cedar
- 3 22″x28″ poster board
- 46 #6×1-1/2″ drywall screws
- 5 19″x24″ tracing paper
- 50 #6×2-1/2″ drywall screws
- 50 1″ brads
- 7 2″x4″12′ pine
Step 2: Designing Your Canoe
Designing a canoe means deciding its shape and size. It’s like planning how your canoe will look and work.
- Basics of Canoe Design: Canoes have a long, narrow shape. They are designed to move easily through water. The bottom of the canoe called the hull, can be flat, rounded, or V-shaped. Each shape changes how the canoe moves in water.
- Customizing Your Canoe: Think about what you’ll use your canoe for. If you want to carry lots of things or go with friends, make it bigger. For fast and easy paddling, keep it slim and long. You can also change the top part, called the deck, to suit your style. Wondering about the canoe’s capacity? Learn more about How Many People Can Fit in a Canoe.
Step 3: Preparing the Workspace
Prepare your workspace like a pro before you start building your canoe. Just like getting your pirate ship ready for a voyage, follow these steps:
Safety First:
- Clear the area: Remove clutter and flammables to prevent accidents.
- Brighten up: Good lighting reduces mistakes and splinters.
- Ventilate: Keep windows open or use fans to avoid dust and fumes.
Stay Organized:
- Label everything: Boxes, tools, paints – it saves time and frustration.
- Create zones: Designate cutting, gluing, and painting areas for efficiency.
- Hang tools: Use hooks to keep them organized and out of the way.
Pro Tip: Plan for the long haul! Cover the floor with drop cloths or cardboard for easy cleanup, and wear gloves and goggles for protection.
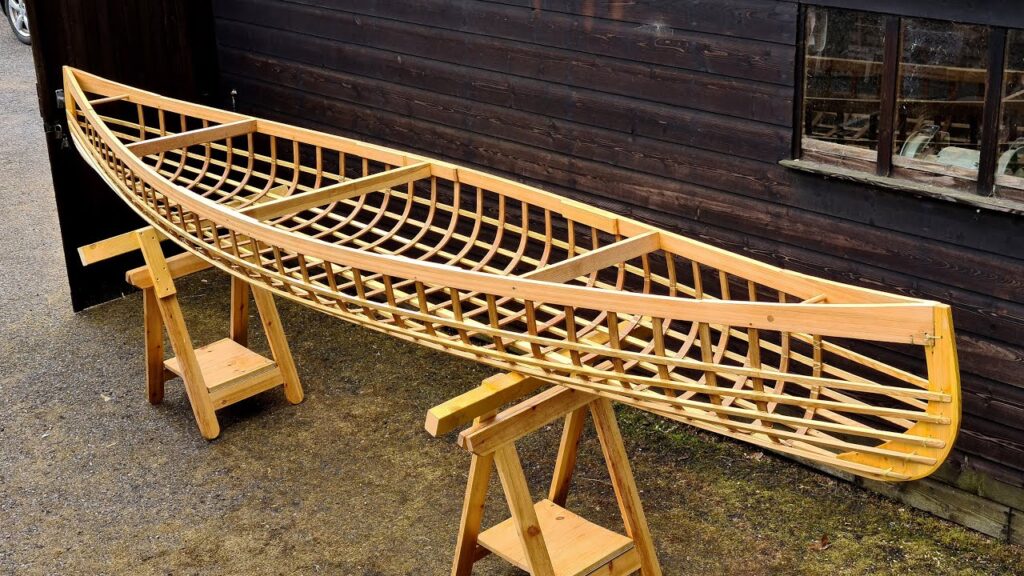
Step 4: Building the Frame
Building the frame is like making the skeleton of your canoe. It’s important for shape and strength.
- Step-by-Step Guide: Start by laying out the keel, the long strip running along the bottom. Attach ribs to the keel to form the canoe’s shape. These ribs are like the bones of the canoe. Make sure they are evenly spaced. Get to know your canoe better, including identifying the Front of a Canoe.
- Stability and Symmetry Tips: To keep your canoe stable, ensure all parts are straight and aligned. Check that both sides are mirror images of each other. This symmetry helps your canoe stay balanced in the water.
Remember, a well-built frame means a strong and steady canoe. Take your time to get it right!
Step 5: Planking the Canoe
Planking, attaching your chosen strips of wood to the frame, is where your canoe truly takes shape.
There are two main techniques:
1. Clinker Style: Overlap each plank like fish scales, creating a beautiful, traditional look. Think Viking longboats!
2. Lapstrake Style: Butt the planks edge-to-edge, creating a smooth, modern silhouette. Picture sleek racing kayaks.
Both methods use waterproof glue and, depending on your wood choice, small nails or staples for extra security. But the key is making sure there are no gaps!
Apply the glue carefully to each plank’s edge, and clamp them securely to the frame while they dry. You can even use tape or cloth as temporary “seams” until the glue sets.
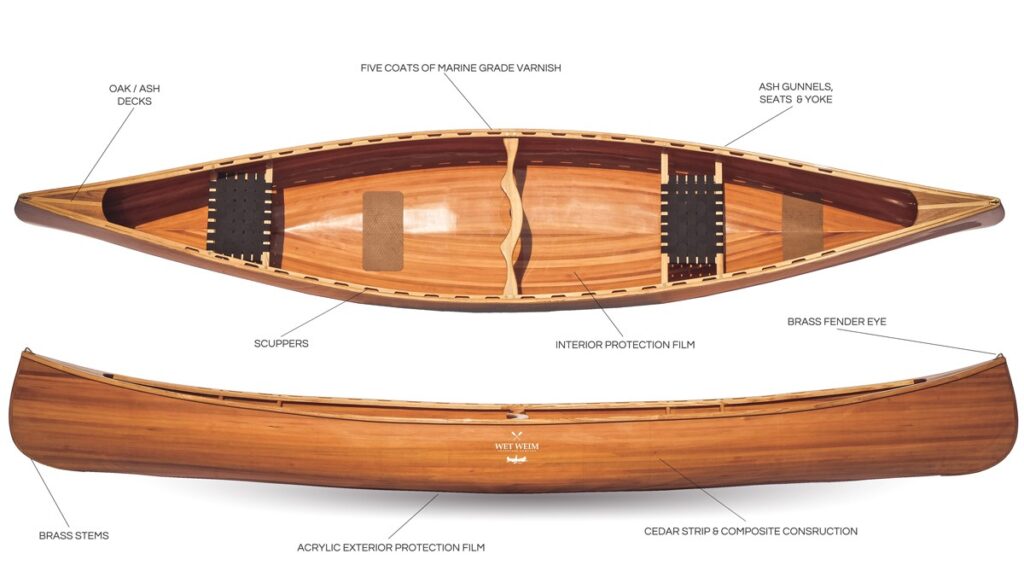
Step 6: Sanding and Finishing
Sanding and finishing make your canoe smooth and protected. It’s like giving your canoe a final touch-up.
- Sanding Techniques: Start with coarse sandpaper, then use finer ones. Sand in the direction of the wood grain. This makes the surface smooth and ready for varnish. Don’t press too hard; let the sandpaper do the work.
- Choosing and Applying Varnish or Sealant: Pick a varnish or sealant that’s waterproof and good for outdoor use. Apply it evenly with a brush. This protects your canoe from water and sun damage. Let it dry completely before using your canoe.
Sanding and finishing are important for a good-looking and long-lasting canoe. Take your time to do it well!
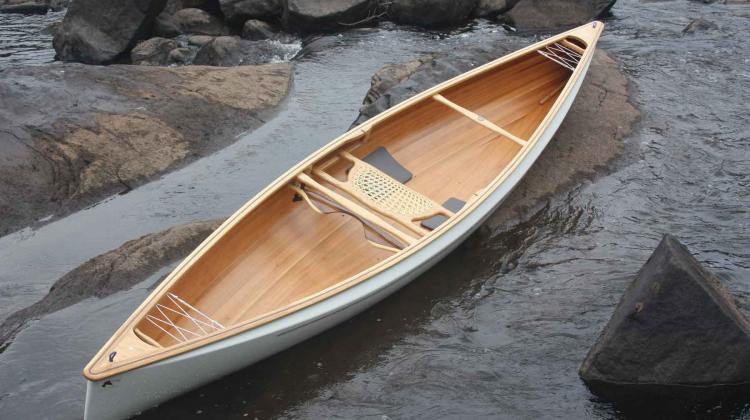
Step 7: Adding Details and Accessories
Your canoe is starting to look majestic, but it’s not ready to set sail just yet! It’s time to add the finishing touches that make it uniquely yours. Think of it as decorating your pirate ship with treasure and maps!
Sailing Smoothly:
- Thwarts: These sturdy crossbars provide crucial support and paddling leverage. Install them securely following your plan’s instructions.
- Seats: Comfort is key! Attach comfy seats or pads for a relaxing paddle, ensuring they’re both secure and positioned for optimal paddling power.
- Yokes: Steering your canoe with style. Depending on your design, install a yoke or paddle to guide your watery chariot through the waves.
Personalization Parade:
- Paint it your way! Unleash your inner artist and splash your canoe with vibrant colors or personalized designs. Marine-grade paints ensure your masterpiece stays ship-shaped.
- Decals and Stickers: Show off your paddling pride! Decorate your canoe with nautical stickers, flags, or even your creations.
- Storage Solutions: Keep essentials close at hand. Install mesh pockets or small containers for snacks, sunscreen, or even a trusty pirate captain’s hat!
Step 8: Safety and Maintenance
Keeping safe while canoeing and taking care of your canoe is key to enjoying it for a long time.
- Tips for Safe Canoeing: Always wear a life jacket. Learn basic paddling and steering skills. Check the weather before you go. Don’t overload your canoe. Stay alert to water conditions. Now that you’ve built your canoe, discover the best ways to transport it: How to Transport a Canoe.
- Maintaining Your Canoe: Store your canoe in a cool, dry place. Keep it away from direct sunlight when not in use. After each trip, clean it with fresh water. Check regularly for any damage or wear. Fix small problems before they get big.
Remember, being safe and keeping your canoe in good shape means more fun on the water for years!
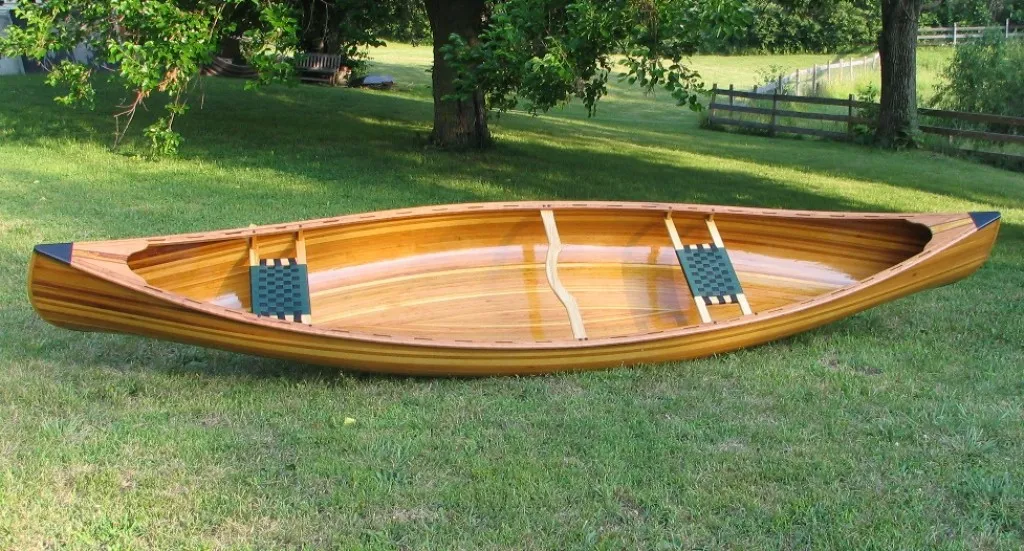
Final Touch
Building your canoe is a fulfilling journey that blends art and skill. It demands patience, precision, and a passion for craftsmanship.
By choosing the right materials and following detailed steps, you can create a canoe that’s not just a mode of transportation, but a personal masterpiece ready for water adventures.
FAQs
Building a canoe is challenging but rewarding. It requires woodworking skills, patience, and attention to detail.
Cedar is popular for its lightness and durability. Other options include birch, ash, or plywood for different styles and budgets.
You’ll need about 40-60 square feet of wood, depending on the canoe’s size and design.
Cedar strips are best for traditional canoes. Fiberglass or Kevlar are great for lightweight, durable canoes. Plywood is a budget-friendly option.


[…] Canoe design impacts its performance and capacity. Flat-bottom canoes are stable but slow. Rounded bottoms are fast but less stable. The material also matters. Aluminum canoes are durable and low-cost. Fiberglass canoes are light but need more care. Plastic canoes are tough and affordable. […]